Bird Crafts for KidsWelcome to my bird crafts for kids section where you'll find easy, inexpensive bird theme craft ideas for kids. 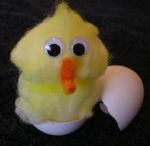
Baby Chick 2 cotton balls In a cup, pour 1/4 cup water and 6 or 7 drops of yellow food coloring. With a tweezer,dip each cotton ball into the yellow colored water and then place each cotton ball on an old folded newspaper to dry. When cotton balls are dry, fluff them out again. Glue the two cotton balls together, one on top of each other. Glue two wiggly eyes on the top cotton ball for eyes. Either cut out a small triangle from the orange construction paper or cut a pipe cleaner into one-1/2 inch piece and bend the piece in half to make an open beak. Glue the beak on below the eyes. We put the chick in the photo in a clean, empty egg shell for decoration. These bird crafts are so cute! 
Bird Binoculars Art and Craft Supplies Needed: 2 empty toilet paper rolls Tape the tubes together at each end so they are lying side by side. Apply the tape from the inside of one tube to the inside of the next tube at both ends. Once tubes are taped together, punch a hole on either side of binoculars, near the end of each tube. Paint or use markers to decorate your binoculars as you like. Thread each end of the string through a hole and knot the ends. 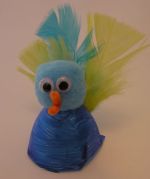
Egg cup Bird Arts and Craft Supplies Needed: 1 egg "cup" cut out from an egg carton Paint the egg cup or styrofoam ball. Let dry. Glue the pom pom or styrofoam ball onto the top of the egg cup. Glue feathers onto the back of the egg cup. Glue two wiggly eyes onto the pom pom or styrofoam ball. Cut a one-1/2 inch piece of pipe cleaner and bend it in half. Glue this onto the bird's head for an open beak. These bird crafts for kids are fast and easy! 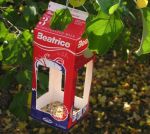
Milk Carton Bird Feeder Adult assistance and supervision required. Supplies Needed: Empty milk carton Rinse out an empty milk carton. With a ruler, and pencil draw and cut out a rectangle 2 1/2 inches by 4 inches with an exacto knife or scissors on each side of the milk carton. Punch two holes in the top of the milk carton and thread a string through. Tie and knot the ends of the string together. Glue the top of the milk carton lid shut. If you desire to paint or decorate your bird feeder, allow to dry well then cover with a self-adhesive plastic or coat with a weather-proof varnish or coating. Hang outdoors and enjoy watching the birds with these bird crafts!
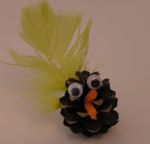
Pinecone Bird Supplies Needed: pinecone Glue one or two feathers to the back of the pinecone near the bottom. Glue two wiggly eyes on the other side of the pinecone near the top. Cut a one-1/2 inch piece of pipe cleaner, bend in half and glue on beneath the wiggly eyes. These bird crafts for kids are simple and inexpensive!
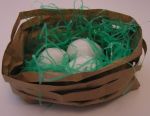
Bird Crafts:Paper bag Bird's Nest Supplies Needed: brown paper lunch bag Cut off the top 3/4 of a paper lunch bag. Scrunch bottom of bag down a bit. Fill with artificial grass, moss or cut up pieces of paper, or green or brown colored streamers. With the remaining 3/4 of the lunch bag that was cut off, cut horizontally across the lunch bag and strips will remain circular and intact, and ready and easy to wrap around nest. Arrange the strips around the outside of the nest.

Bird Crafts:Cardboard Bird Supplies Needed: Thin cardboard( ex:from an empty creal box) Draw a bird on a piece of cardboard and cut out. Paint or use markers to color in the bird. Glue on feathers. Cut two-1 1/2 inch pieces of pipe cleaner. Cut two more pieces of pipe cleaner, each 1/2 inch long. Twist the 1/2 inch piece of pipe cleaner near the bottom of one 1 1/2 piece of pipe cleaner. Do the same with the other. These are the bird's legs and feet. Tape or glue the legs to the bird's body(to the back of the cardboard).

Rocking Bird Supplies Needed: flexible paper plate Lightly fold a paper plate in half and then unfold it. Using a ruler draw two straight lines two inches on either side of the fold. Fold the paper plate along each of the lines you drew.(Make sure your folds are straight so your bird will rock straight). This will be the bird's body. Cut a small 1/2 inch slit in the paper plate at the end where you want your bird's head to be. Paint the paper plate. Let dry. Trace around a cup or teacup on construction paper and cut circle out. Remember to add a tab to the bottom of the circle. Draw an eye on both sides of the circle. This will be the bird's head. Trace and cut out child's hands from construction paper to match the color you painted the paper plate with. These will be the birds feathers. Attach the bird's head to the paper plate by inserting the tab on the circle into the slit cut in the paper plate. Fold the tab and tape to the underside of the paper plate. Glue the handprints on either side of the bird's body. Cut out a small triangle from yellow or orange paper and glue onto bird's head for it's beak. Add a feather if desired to top of bird's head. Easy and inexpensive bird crafts for kids!
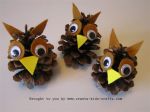
Pinecone Owls Supplies Needed: Large pinecones Find pinecones that are flat enough to stand upright or snip off a small amount from the bottom so that it is flat enough to stand the cone on end. Cut out circles from the brown felt or foam. The circles should be a little larger than the size of your googly eyes. Glue the googly eyes onto the circles. Cut out triangle shaped ears from the brown felt or foam and triangle shaped beaks from the yellow felt or foam. Glue the eyes, ears and beaks onto the pinecones. Click here to see more bird craft ideas for kids. Fun Bird Craft Kits:What kids crafts can I help you find today?  |


